Step-by-Step Guide to Implementing Azure AD Password Protection
In today’s digital age, strong password policies are the cornerstone of robust cybersecurity. Passwords are often the first line of defense against unauthorized access to your organization’s data and systems. Weak or easily guessable passwords can pose a significant security risk. Azure AD Password Protection is a powerful solution offered by Microsoft that can help organizations bolster their password security.
In on-premises AD environment we can force users to use complex passwords via group policy. However, we couldn’t ban passwords using this method. Azure AD support banned password lists and smart lockout for Azure AD & on-premises AD in hybrid setup
Azure AD Password Protection enforces strict password policies, combats common password-based attacks, and enhances overall security. This tool ensures that users create and maintain strong, complex passwords, reducing the risk of unauthorized access to critical resources.
In this blog, I will walk you through a step-by-step process to implement and configure Azure AD Password Protection, enabling you to enhance your organization’s security by enforcing stringent password policies.
First Step is to enable password protection on Azure Portal and create a list of banned passwords.
- Log in to Azure Portal as global administrator.
- Click on Entra ID (Previously known as Azure AD)

- Then Security

- Then Select Authentication Method.
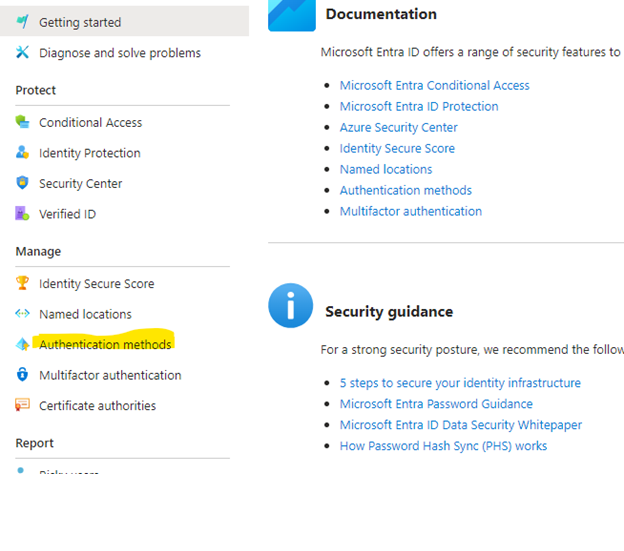
- Under Authentication Methods select Password Protection.

- It will bring you to the Password Protection settings. Please configure settings according to your requirements. To define ban password list, click on Yes for Enforce custom list and then type the passwords you like to ban.

- To extend same policy for on-premises AD, click on Yes for Enable password protection on Windows Server Active Directory as shown in the screenshot
Now we are done at Azure Portal, and we have to configure a few things at on-Prem servers. So, Microsoft recommends to install Password Protection DC agent on all domain controller and Password Protection proxy service on at least two member servers.
Let us install DC agent first.
Download the setup files from this link https://www.microsoft.com/en-us/download/details.aspx?id=57071
Let’s first install DC Agent in On-premises domain controller.
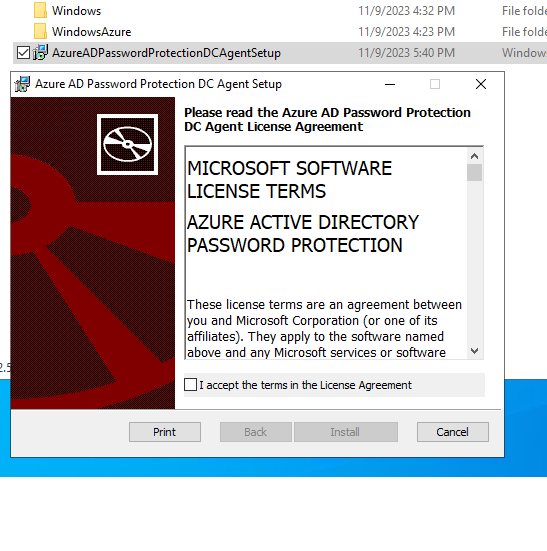
Installation is done and it requires a reboot, so I rebooted the Domain Controller.

Let’s now move to a member server and install Proxy agent.


Now we need to register a Proxy agent. For this we have to run few PowerShell commands. Let’s start with importing module.

Next command is to register password protection proxy which required a Global Administrator permission.
Register-AzureADPasswordProtectionProxy


One this is completed, third command we have to run is to register forest.
Register-AzureADPasswordProtectionForest

You can check that service is running now.

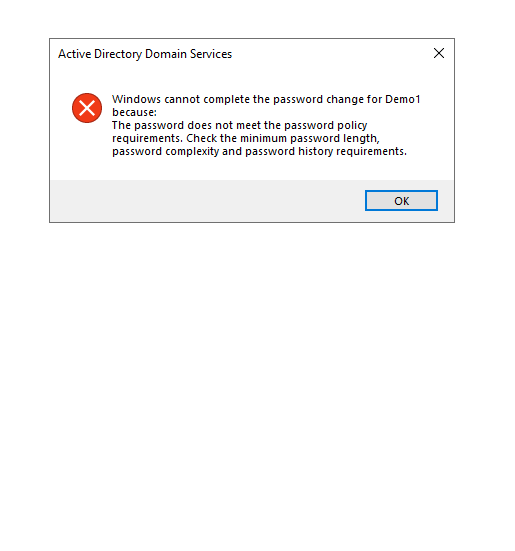
Let’s now go to Active Directory Users and Computers and try to reset password which is in a banned password list.


It is not allowing me to reset password mentioned in the banned password list in Azure Portal.
You can check this in the event log when it has reason mentioned for Azure Password Policy.

