Step-by-Step Guide to Implementing Azure AD Password Protection

      Step-by-Step Guide to Implementing Azure AD Password Protection

In today’s digital age, strong password policies are the cornerstone of robust cybersecurity. Passwords are often the first line of defense against unauthorized access to your organization’s data and systems. Weak or easily guessable passwords can pose a significant security risk. Azure AD Password Protection is a powerful solution offered by Microsoft that can help organizations bolster their password security.

In on-premises AD environment we can force users to use complex passwords via group policy. However, we couldn’t ban passwords using this method. Azure AD support banned password lists and smart lockout for Azure AD & on-premises AD in hybrid setup

Azure AD Password Protection enforces strict password policies, combats common password-based attacks, and enhances overall security. This tool ensures that users create and maintain strong, complex passwords, reducing the risk of unauthorized access to critical resources.

In this blog, I will walk you through a step-by-step process to implement and configure Azure AD Password Protection, enabling you to enhance your organization’s security by enforcing stringent password policies.

First Step is to enable password protection on Azure Portal and create a list of banned passwords.

  1. Log in to Azure Portal as global administrator.
  2. Click on Entra ID (Previously known as Azure AD)
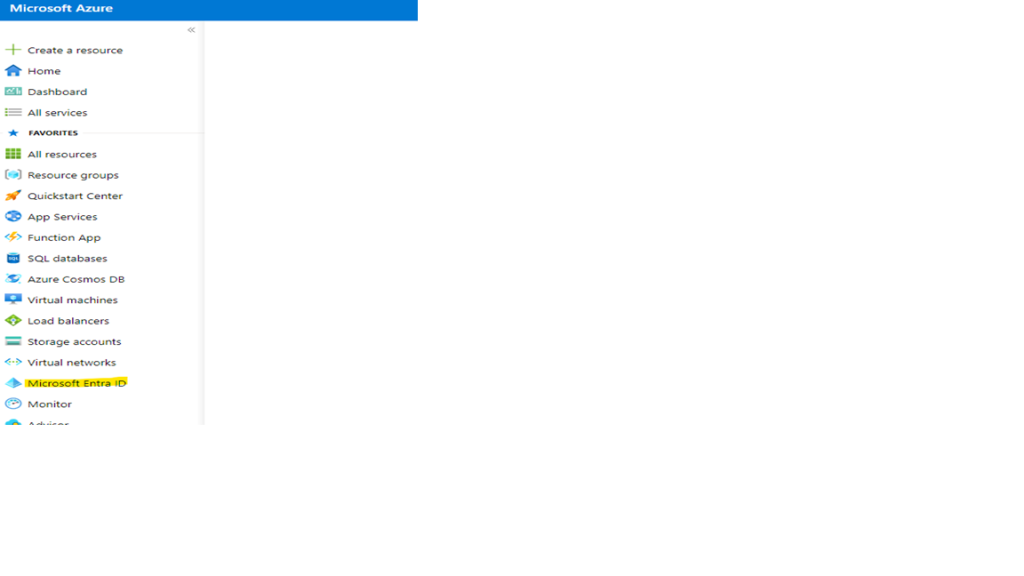
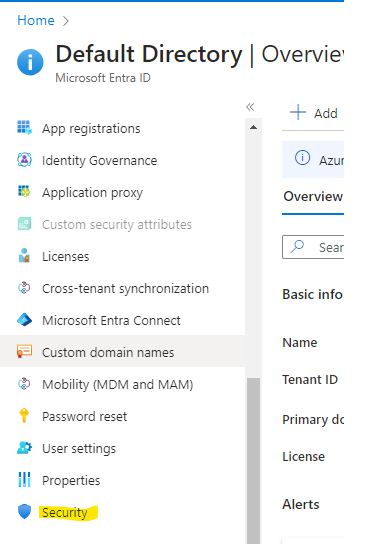
  • Then Security
  • Then Select Authentication Method.
  • Under Authentication Methods select Password Protection.
  • It will bring you to the Password Protection settings. Please configure settings according to your requirements. To define ban password list, click on Yes for Enforce custom list and then type the passwords you like to ban.
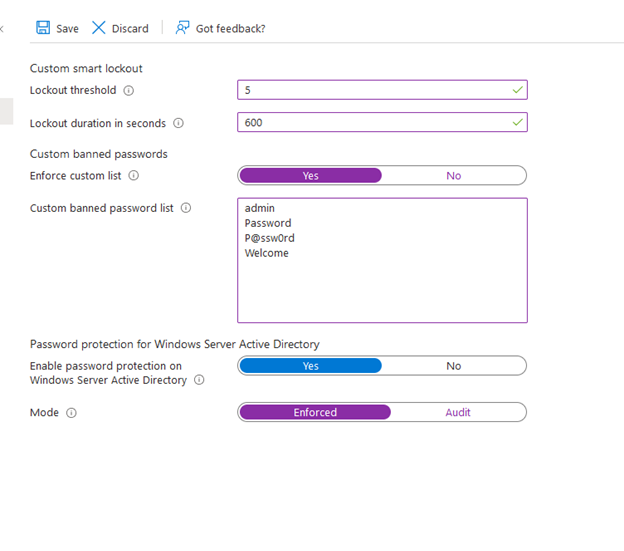
  • To extend same policy for on-premises AD, click on Yes for Enable password protection on Windows Server Active Directory as shown in the screenshot

Now we are done at Azure Portal, and we have to configure a few things at on-Prem servers. So, Microsoft recommends to install Password Protection DC agent on all domain controller and Password Protection proxy service on at least two member servers.

Let us install DC agent first.

Download the setup files from this link https://www.microsoft.com/en-us/download/details.aspx?id=57071

Let’s first install DC Agent in On-premises domain controller.
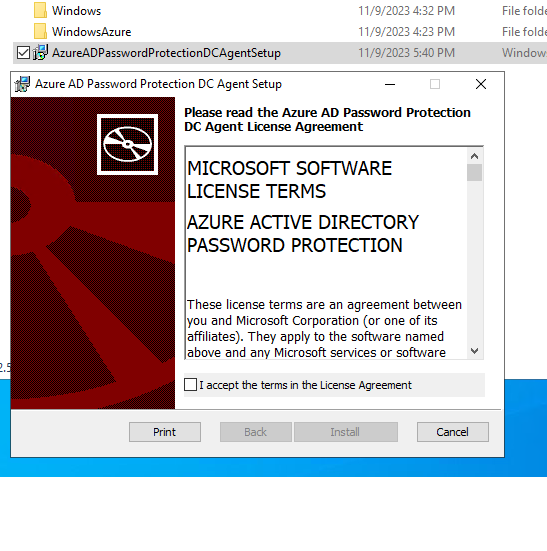
Installation is done and it requires a reboot, so I rebooted the Domain Controller.
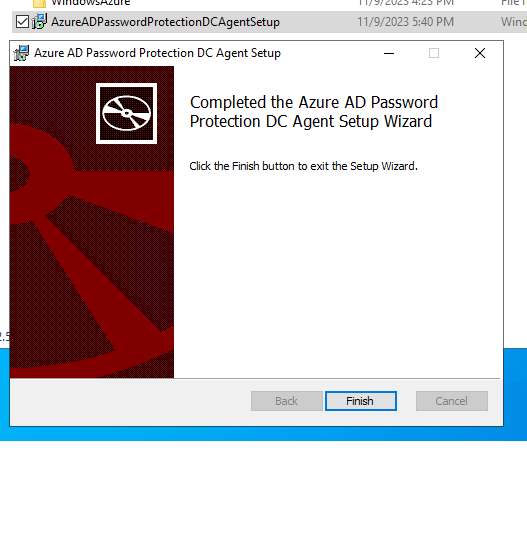
Let’s now move to a member server and install Proxy agent.

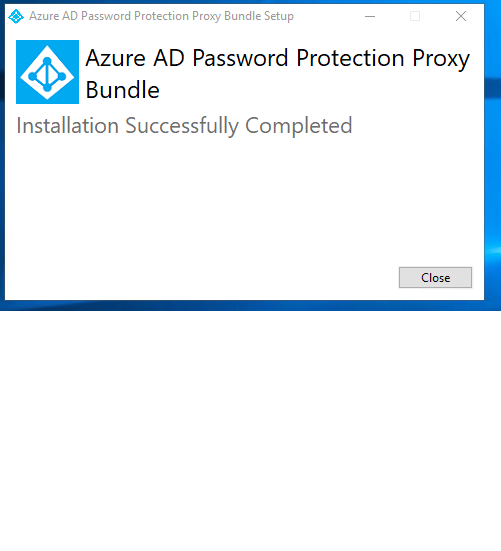
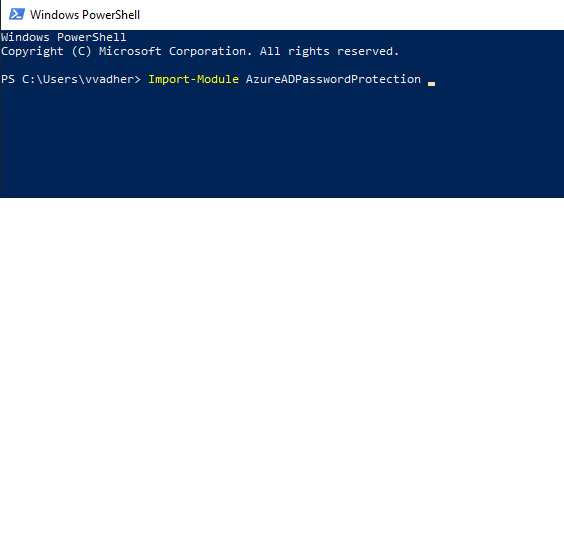
Now we need to register a Proxy agent. For this we have to run few PowerShell commands. Let’s start with importing module.
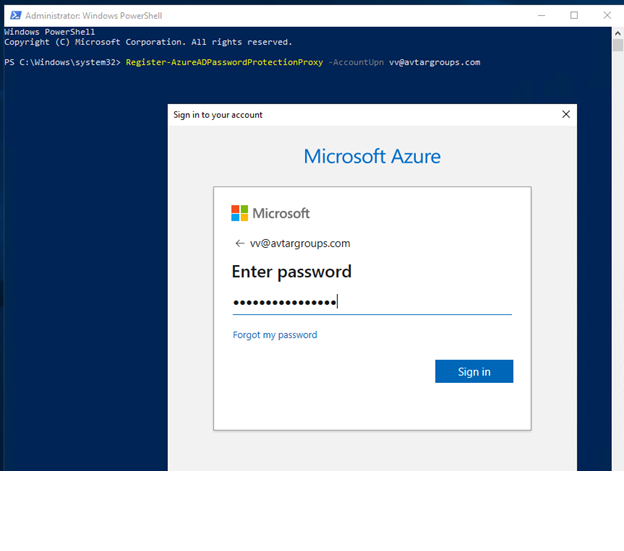
Next command is to register password protection proxy which required a Global Administrator permission.

Register-AzureADPasswordProtectionProxy

One this is completed, third command we have to run is to register forest.

Register-AzureADPasswordProtectionForest

You can check that service is running now.

Let’s now go to Active Directory Users and Computers and try to reset password which is in a banned password list.

It is not allowing me to reset password mentioned in the banned password list in Azure Portal.

You can check this in the event log when it has reason mentioned for Azure Password Policy.

Azure Virtual Desktop – Azure AD Joined – Intune Managed

Let’s dive straight into the Demo and set up our sample Azure Virtual Desktop environment.

But before creating Host Pools and other Azure Virtual Desktops elements let’s have a look at Azure AD,I have created few users for the purposes of the lab.

Also, as these Azure Desktops will be Intune managed, lets have a look at Intune portal. We need to make sure that Windows Automatic enrollment is already set up for all.

Create Host Pool

A Host Pool is a collection of Azure virtual machines that register to Azure Virtual Desktop as session hosts when you run the Azure Virtual Desktop agent. All session host virtual machines in a host pool should be sourced from the same image for a consistent user experience.

So, what we’ll do in this section is as follows:

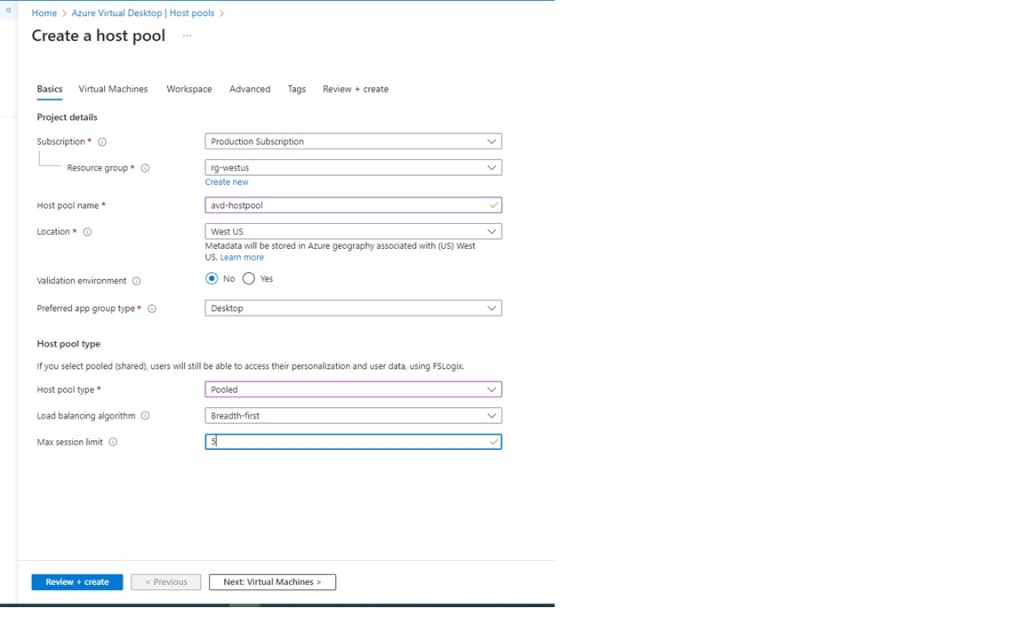
  • Create a Host Pool named avd-hostpool of pooled type.
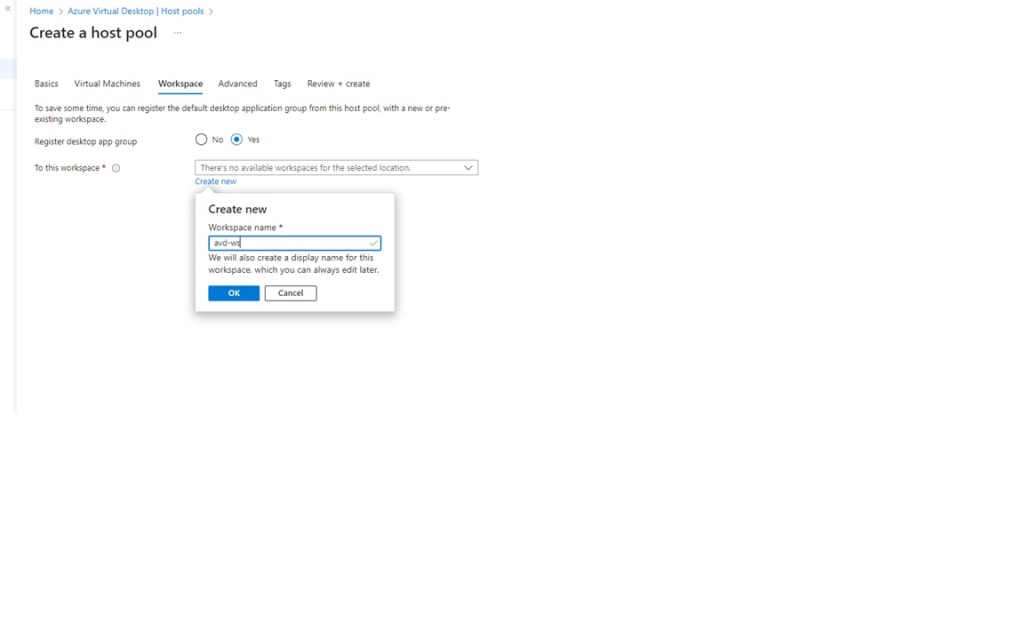
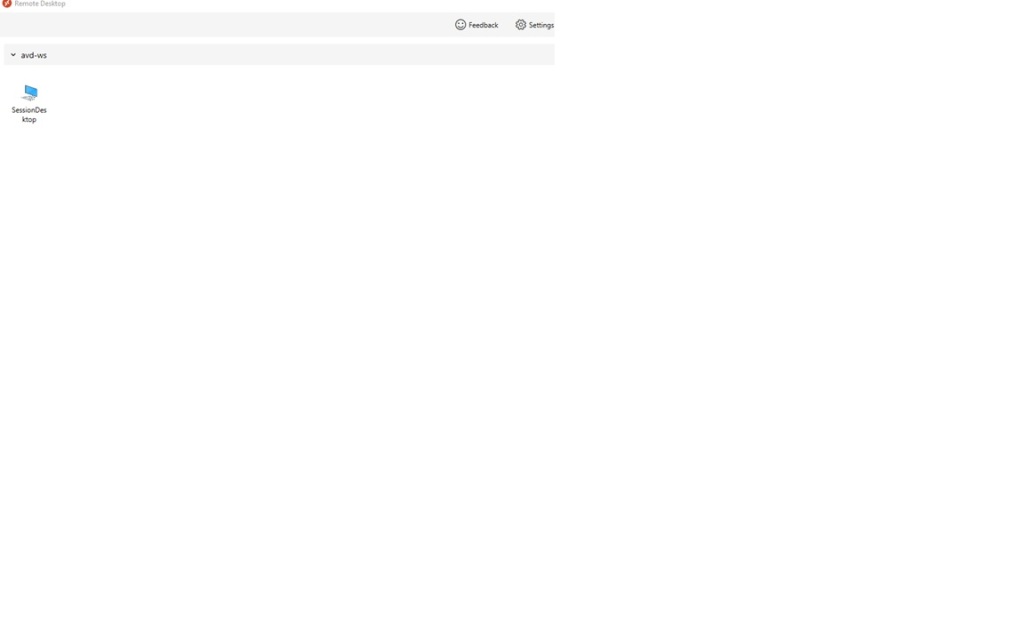
  • Register the default desktop application group from this hostpool to a new workspace named avd-ws.

Now select Host pools under Manage blade and then click on Create.

We will provide the details required to create a Host Pool.

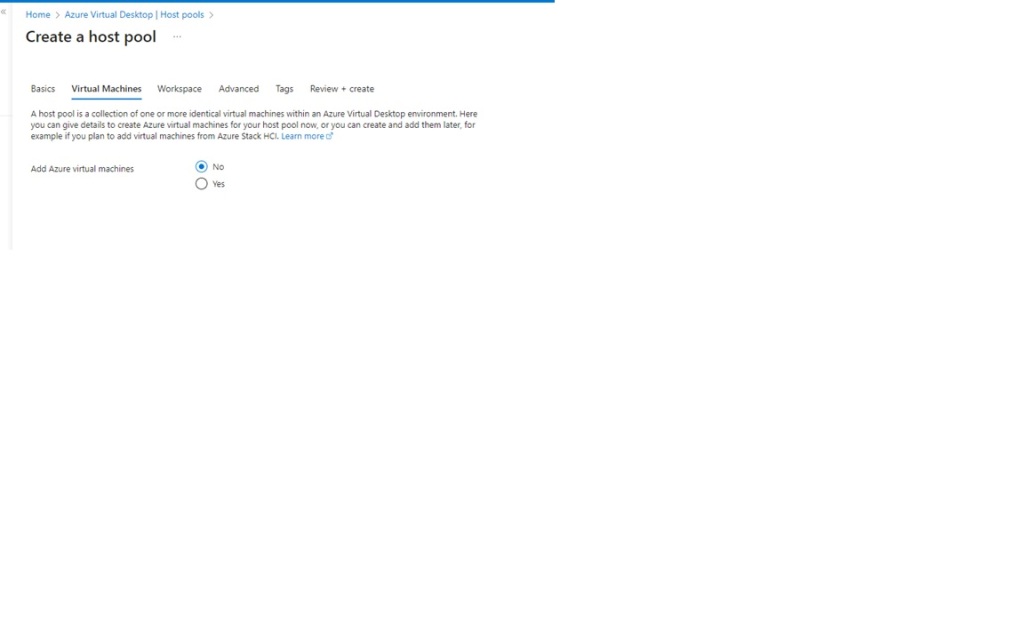
Now we click next and go the Virtual machines tab. I’m going to leave this at “No” for now – because I am using Azure AD for authentication, I have some additional steps to do before creating my Session Hosts.

We click next and move on to the Workspace tab. Once we select “Yes” to “Register desktop app group”, we need to create a workspace called

We click next and move on to the Workspace tab. Once we select “Yes” to “Register desktop app group”, we need to create a workspace called avd-ws

We will not do anything with advance section and click next

Click review + create.

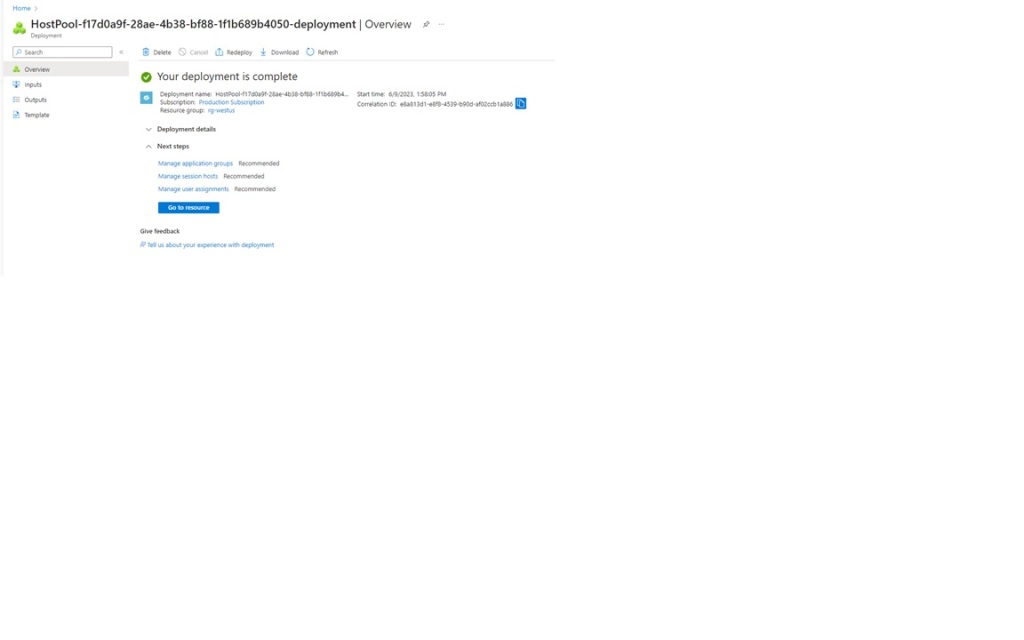
Once we are happy click on “Create” to create our Host Pool and we’ll get a screen like below to tell us the Deployment is completed:

And we can see that we have a Host Pool created in our Azure Virtual Desktop console:

Configure Azure AD Authentication

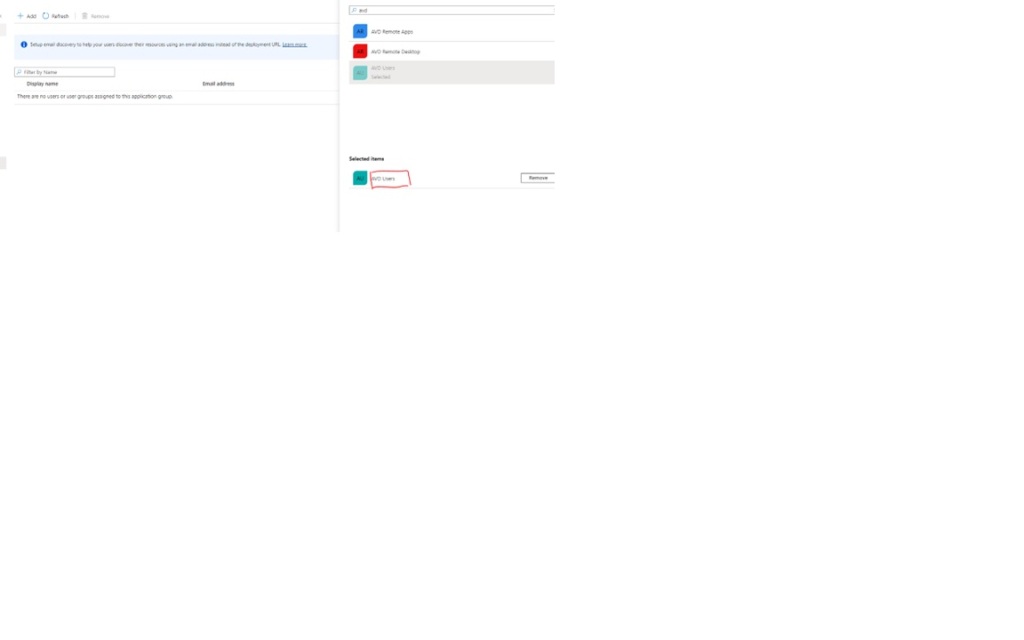
Because I’m using Azure AD for the demo, I need to assign my users permissions to access the desktop. Firstly, I need to go to my DAG object in the Application Group of the Host Pool and go to “Assignments”:

We then click on Add and select our users group

Azure AD Role Assignments

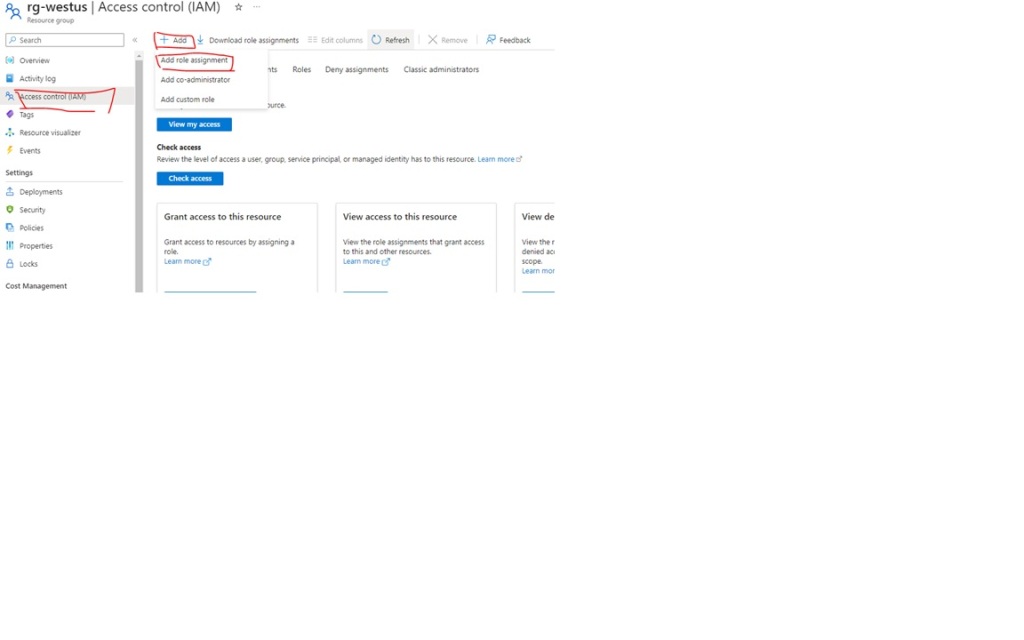
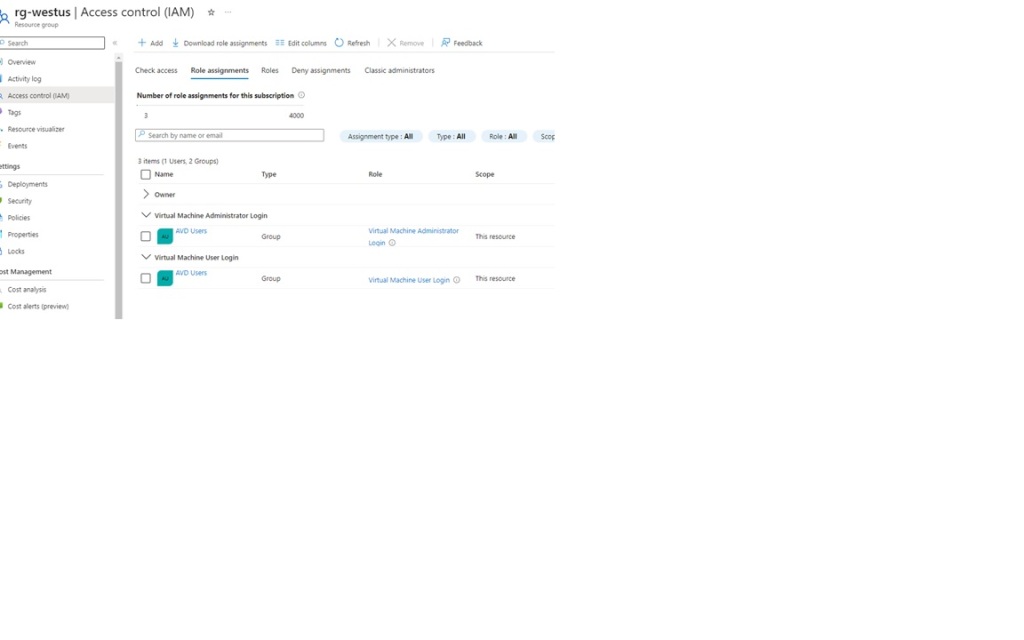
To allow users to log on to the Virtual Machines, we also need to add Role Assignments. There are 2 we need to add:

  • Virtual Machine Administrator Login
  • Virtual Machine User Login

We can ensure that these roles are assigned automatically by assigning this at the IAM level of our Resource Group:

RDP Properties

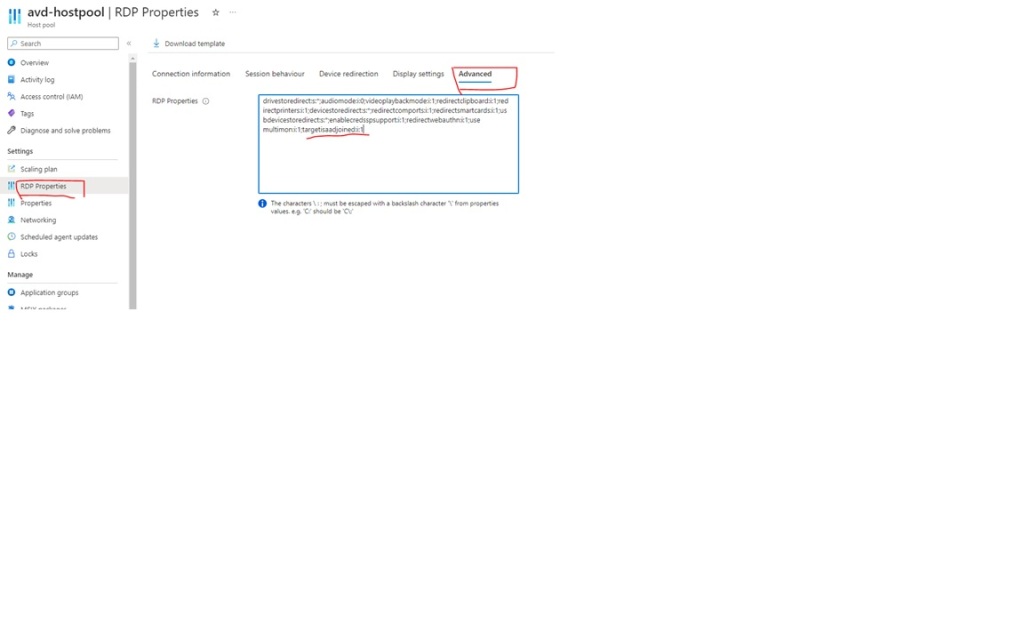
For the Host Pool to know that the session hosts are Azure AD joined, we need to add an advanced RDP property. So, we go back to my Host Pool, choose “RDP Properties” from the settings menu and under Advanced we add the following string:

targetisaadjoined:i:1

Click on Save to save the changes.
Create Session Hosts

We’re now ready to create our Session Hosts. So, we’ll go back to our Host Pool, select “Session Hosts” from the “Manage” menu and click on “Add”

The Basics tab is already pre-populated with the information from our Host Pool:

Click next for Virtual machine.

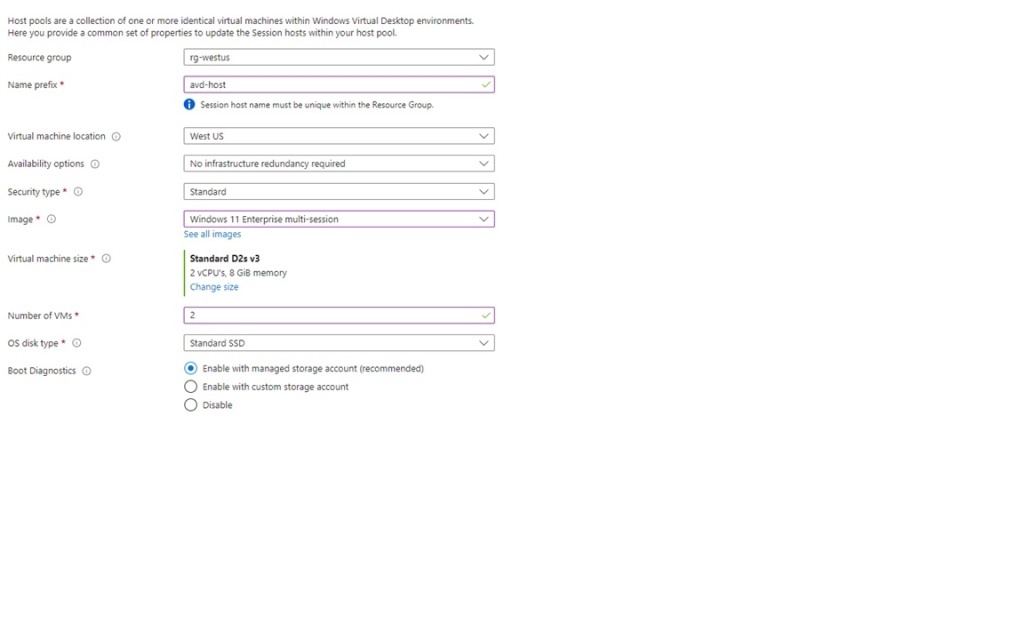
This will give us the options to provide details for the VMs we need to add:

Resource Group: Select your resource group from the drop down.

Name prefix: avd-host

Virtual machine location: West US

Availability options: Select No infrastructure redundancy required from the drop down (again, this is being used for the purposes of the demo).

Image type: Gallery

Image: Windows 11 Enterprise multi-session

Virtual machine size: Standard D2s v3. (You can click on Change Size, then select the size you require and click on Select to choose the size)

Number of VMs: 2

OS Disk Type: Standard HDD (you can choose based on your requirements)

Next we scroll down to the “Network and security” section and specify the Virtual Network and Subnet that we wish to use:

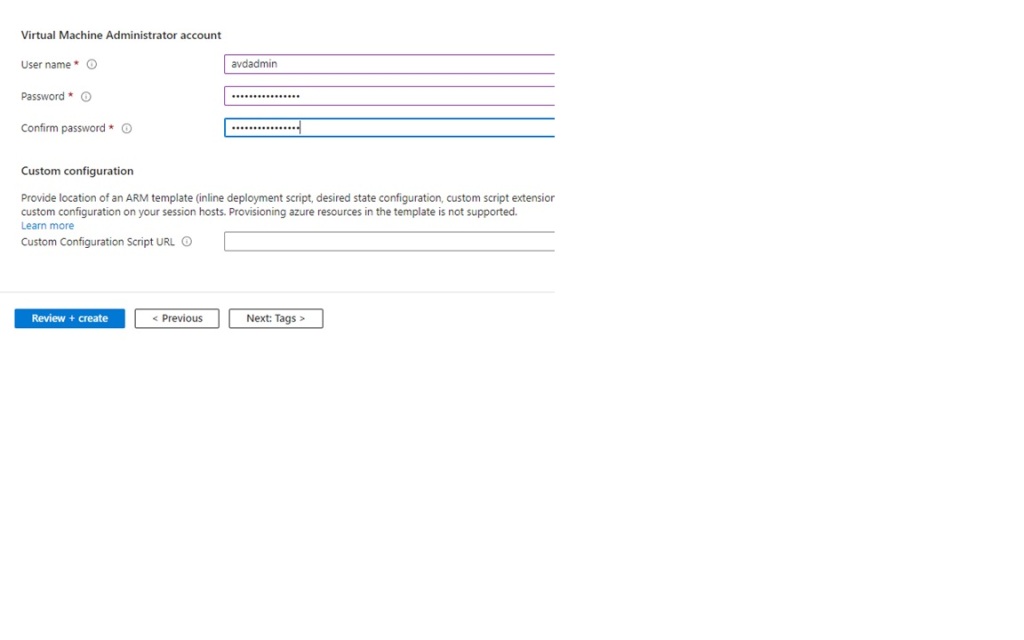
Finally on this screen, we scroll down and specify whether we wish to join an Active Directory or Azure Active Directory. We also specify admin accounts for the Session Host VM’s we are creating:

Also select Enroll with Intune as this demo if for Azure AD joined and Intune managed Azure Virtual Desktop.

And then click on review+create

Looks live it is validated and good to click on create.

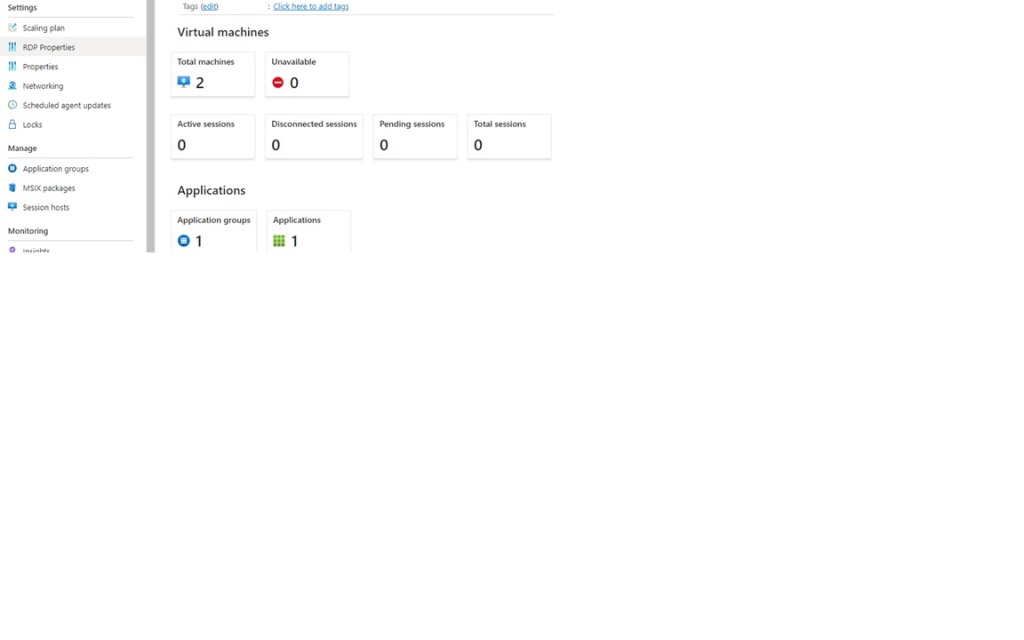
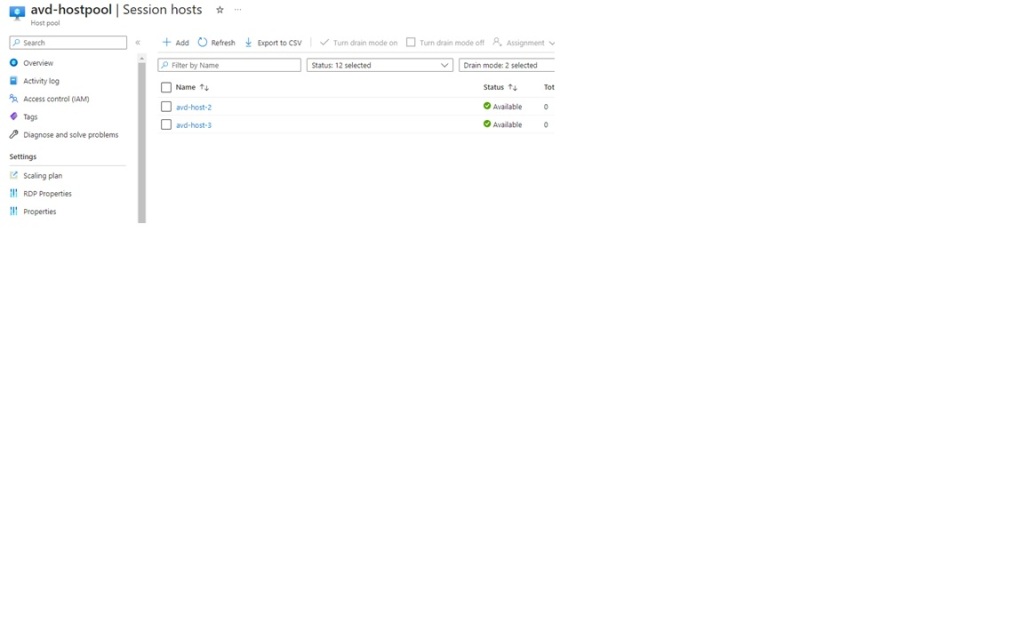
And look at that, two sessions hosted joined to Azure AD is created.

Just click on Session hosts and you will see two sessions hosts ready to servers AVD users.

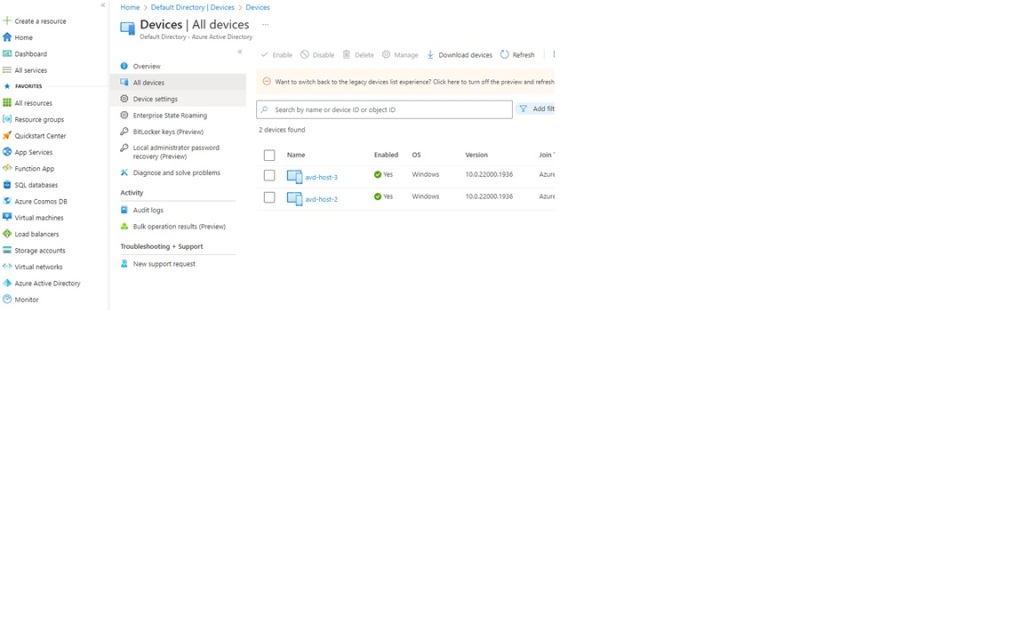
You can also check these devices under Azure Active Directory to make sure they are Azure AD joined.

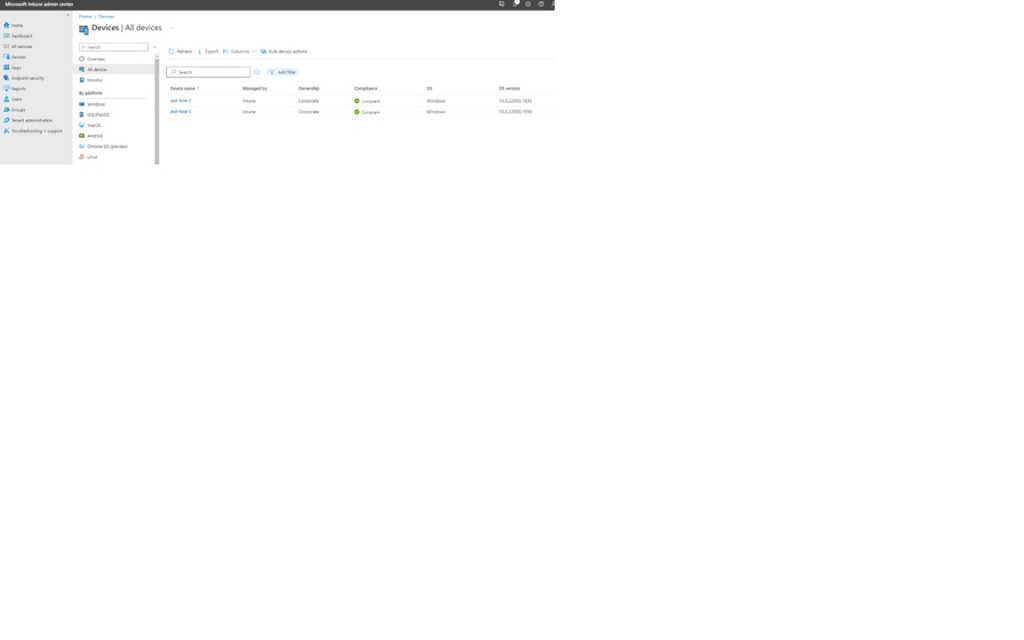
Let’s check if these two sessions hosts are under Intune admin center.

These hosts are Intune joined and complained.

Now lets try our user to login to session hosts

And AVD user is able to login

And we can see that avd-host-3 is serving this user.

A Step-by-Step Guide to Installing the AzFilesHybrid PowerShell Module and Join Azure File share to Active Directory Domain Services

Subscribe to continue reading

Subscribe to get access to the rest of this post and other subscriber-only content.

How to Set Clock Time on AD domain Controller and Sync Windows Clients

How to find your Active Directory Network Time Server

If someone complains that the time on a Windows 7 /Windows 10 PC is off, we can first sync the Domain Controller to an External Time Source, then sync their PC to the DC. How do you sync the computer to the same time as the cell phone/NIST/External Time Source, and make sure that all computers on your network have the same time as the domain controller?

First, determine from a client computer which computer is the authority for your time server. This is usually your Primary Domain Controller. To do so, on the client PC, open a command prompt and run the command:net time

This should return something similar to the following:

This shows “Current time at \\NETTIMESERVER.domain.com” which is your net time authority.

How to check your domain controller time against a global time provider:

On the server that net time identified (NETTIMESERVER / primary domain controller,) right-click on your PowerShell icon and choose Run as Administrator.

Run the following command to only check how much time your server is off from the global time authority. This command doesn’t do the sync, it just displays how much time your server is off. The result will display plus or minus hours/minutes/seconds/fractions of seconds.

w32tm /stripchart /computer:time.windows.com /dataonly

The results should display something similar to the following (hit CTRL+C to stop the data stream):

So we can see our DC is ahead by 39 seconds.

Sync Domain Controllers Time Against Global Time Authority

So now we want to manually configure our server to use a certain global time provider: time.windows.com – to do this run the following command:

w32tm /config /manualpeerlist:time.windows.com /syncfromflags:MANUAL

Next type:

w32tm /config /update

Again you should receive a message “The command completed successfully.”

Now to immediately synchronize the time use the following command:

w32tm /resync

We can now check again how much the time is off from the global provider by issuing the stripchart/dataonly command and check the results.

Restoring an Exchange database from a recovery database

Step 1: Copy or restore a database and its log files

First, copy the database file with its log files to a location that you are going to use for the recovery database. You may manually copy the files or use Windows Server Backup to restore the backup copy of the database and log files.

Step 2: Check database status

By default, the restored mailbox database will be in the Dirty Shutdown state. To check the database status and bring the mailbox database to Clean Shutdown state, use the following commands:

The command below provides the current status of the database.

Eseutil /mh <path to database file>

When the database is in Dirty Shutdown state, it cannot be mounted. To bring the database to clean state, Soft Recovery is required. The command to perform Soft Recovery is as follows:

Eseutil /r E001 /l “C:\Program Files\Microsoft\Exchange Server\Vxx\Mailbox\Logs” /d “C:\Program Files\Microsoft\Exchange Server\Vxx\Mailbox\MyDatabase.edb” /i

Once the command is executed successfully, check the status of the database. It should be in Clean Shutdown state.

Eseutil /mh <path to database file>

In case the database is still in Dirty Shutdown state, you may proceed with Hard Recovery. However, it may lead to data loss as Hard Recovery removes damaged mailboxes and mail items from the database. Hard Recovery should only be used as the last resort. Like Soft Recovery, it isn’t guaranteed that the database will get to a healthy state after Hard Recovery. The command is as follows:

ESEUTIL /P <path to database file>

Step 3: Create a recovery database

Once the database is in Clean Shutdown state, you can use the New-MailboxDatabase cmdlet to create a recovery database. The syntax is as follows:

New-MailboxDatabase -Server EX01 -Name RecoveryDB01 -Recovery -EdbFilePath “C:\Databases\Recovery\RecoveryDB01EDB" -LogFolderPath "C:\Databases\Recovery\RecoveryDB01"

To check if the recovery database is created successfully, execute the following PowerShell command:

Get-MailboxDatabase RecoveryDB01 | Format-List

Step 4: Mount the recovery database

Now you are ready to mount the database for recovery on the server. The command is as follows:

Mount-Database RecoveryDB01

Check if the database is mounted successfully by using the following cmdlet:

Get-MailboxDatabase -Status| Format-List name, server, mounted -AutoSize

At this stage, you have successfully restored and mounted the Exchange database. The next step is to extract and restore mailboxes and mailbox items by using the New-MailboxRestoreRequest cmdlet. Once the mailboxes or mailbox items are restored, you can go ahead and remove the recovery database by using the following command:

Dismount-Database RecoveryDB01

Type Y and press Enter to confirm dismount. Then delete the database and log files from the disk to free up the storage space.

Hybrid Exchange Email moderation issue

Issue with Group Moderation: Moderator who is on office 365(Exchange Online) is not getting approve or reject button when any user send email to all users for approval

When someone sends email to a moderated group, and the moderator is hosted on Office 365, the buttons for Approve and Reject are not showing at his email client.

We will talk about how important is to configure Remote Domains both in the on-premises Exchange environment and on Exchange Online to preserve headers and TNEF format between the two organizations. The TNEF format is what makes the Approve or Reject buttons appear in the email messages.

Reason

It turned out that a setting called TNEF (Transport Neutral Encapsulation Format) is causing this to happen. We need to make sure TNEF format is enabled when sending emails out to Office 365 tenant

Solution

We need to make our on-premise Exchange servers deals with both @contoso.mail.onmicrosoft.com and @contoso.onmicrosoft.com as a well behaved remote domains.

So create remote domain for @contoso.onmicrosoft.com and @contoso.mail.onmicrosoft.com at the on-premises Exchange server if none is already created by Exchange hybrid wizard.


Check if it is already created with below cmdlets.

Get-RemoteDomain

and then configure the TNEF to true simply by running

Set-RemoteDomain  with -TNEFEnabled $true

Same applies to Exchange Online, we need to create remote domain for @contoso.com with TNEFEnabled $true.

Import VM into AWS cloud from VMware(on-Prime)

  1. Install AWS CLI and configure access key id and secret access key.

  1. Create S3 bucket where we can upload VM
  2. Create Role for VM Import (vmimport)
  3. Edit trust relationship on newly create Role name vmimport


{

“Version”: “2012-10-17”,

“Statement”: [

{

“Effect”: “Allow”,

“Principal”: { “Service”: “vmie.amazonaws.com” },

“Action”: “sts:AssumeRole”,

“Condition”: {

“StringEquals”:{

“sts:Externalid”: “vmimport”

}

}

}

]

}


  1. Remove VMware tools from the VM under VMware
  2. Create user in the VM server that would be used to take remote access
  3. Configure Dynamic IP Address DHCP for NIC under VM
  4. Shutdown VM and Export as OVA
  5. Upload the OVF into S3 Bucket
  6. Open AWS CLI and run command to import the image from S3 to AMI

aws ec2 import-image –description “Demo OVA” –license-type byol –disk-container file://D:/containers.json


The following is an example containers.json file.

[

{

“Description”: “Demo OVA“,

“Format”: “ova”,

“UserBucket”: {

“S3Bucket”: “my-import-bucket“,

“S3Key”: “my-windows-2012-vm.ova

}

}]


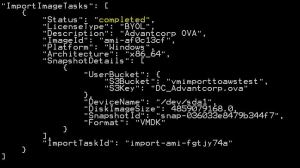
To check status

aws ec2 describe-import-image-tasks –import-task-ids “import-ami-fgtji74a”


You can then create EC2 instance from this imported AMI.


Site To Site VPN Between AWS and SonicWALL

VPN (Virtual Private Network) technology can help to create and encrypt a connection between LAN networks over the Internet. Also, local resource either on AWS or behind SonicWALL can be accessed securely through Site to Site VPN.

In this blog, we are showing how to create a VPN between AWS and SonicWALL UTM.

Create and configure VPN :

1. Login to AWS account.
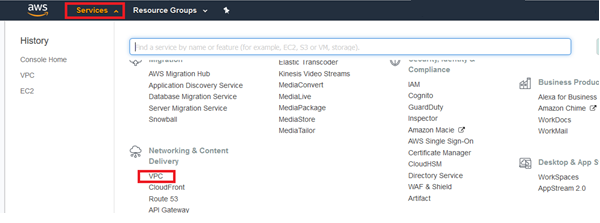
2. Open Services then select VPC.

AWS account interface

3. To create new VPC, this will act as mater subnet, click Your VPCs then hit Create VPC.

Create new VPC

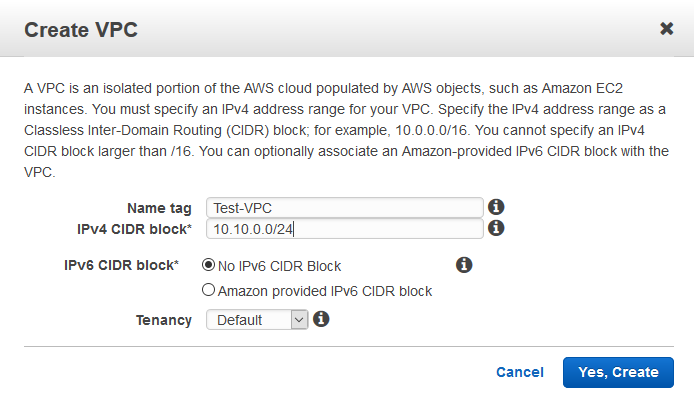
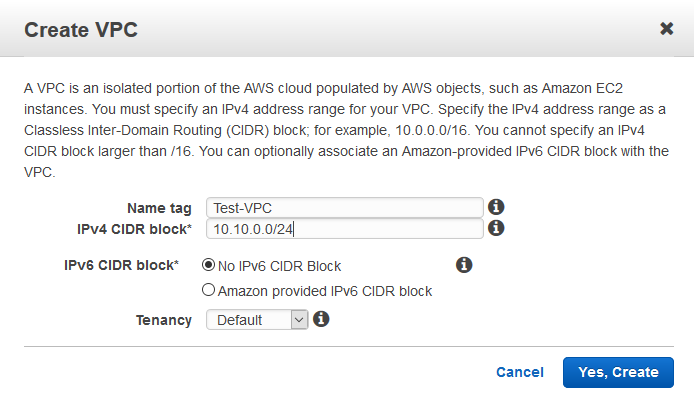
4. Put relevant Name tag, put IP in IPv4 CIDR block, no IPv6, and Tenancy as Default and click the button YesCreate.

IPv4 CIDR block

5. Now go to Subnets and click Create Subnet.

Create-Subnet

6. Put relevant Name tagSelect VPC created earlierAvailability Zone, mention required IPv4 CIDR block and click the button YesCreate.

Hint : IPv4 CIDR block can be any subset of VPC subnet or it could be same as VPC subnet.

IPv4 CIDR block

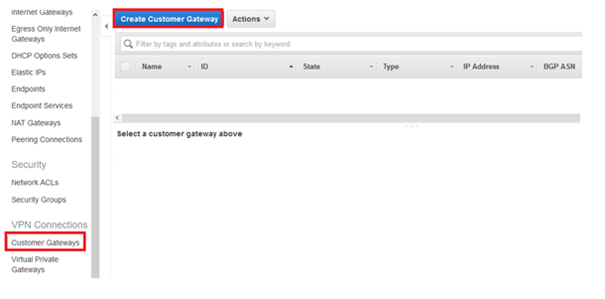
7. Go to Customer Gateways and click on Create Customer Gateway.

Create Customer Gateway

8. Put relevant Name, select Routing as Static, put IP device as IP Address and click Create Customer Gateway.

 IP Address and click Create Customer Gateway

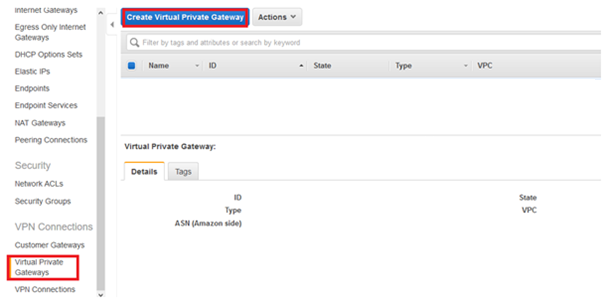
9. Go to Virtual Private Gateways and click Create Virtual Private Gateway.

Virtual Private Gateway

10. Put relevant Name, select Amazon default ASN and click button Create Virtual Private Gateway.

Amazon default ASN and click button Create Virtual Private Gateway

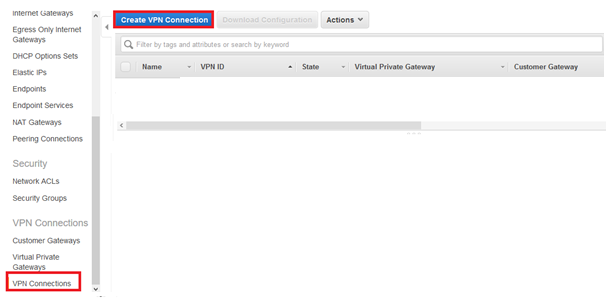
11. Go to VPN Connections and click Create VPN Connection.

click Create VPN Connection

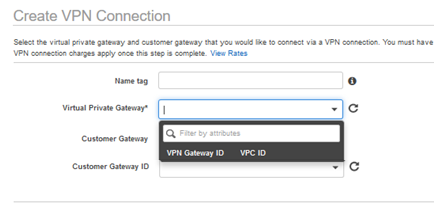
12.  Mention relevant Name tag and select the Virtual Private Gateway created in step 10.

select the Virtual Private Gateway created

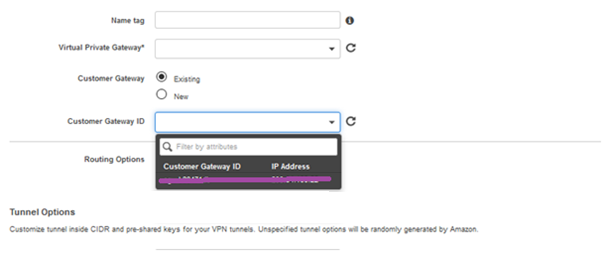
13. Now select Customer Gateway as Existing and select the Customer Gateway ID which was created in step 8.

Customer Gateway ID

14. Select Routing Options as Static.

15. Mention internal network (LAN) behind the SonicWALL as Static IP Prefixes. This will create routes to the network behind the SonicWALL.

network behind the SonicWALL

16. Leave the Tunnel Options blank and click Create VPN Connection, AWS will generate these for you.

Create VPN Connection

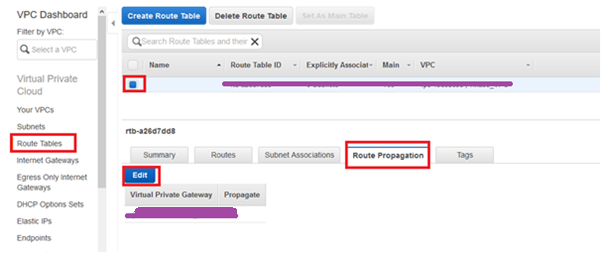
17. Now go to Route Tables > Select the required Route Table > under the tab Route Propagation > click Edit.

Route Tables

18. Enable route propagation for Virtual Private Gateway by putting check mark and click Save.

Virtual Private Gateway

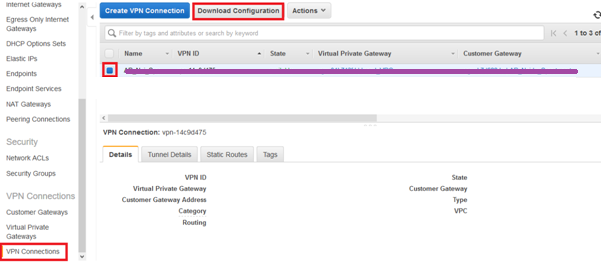
19. Go to VPN Connections > Select required VPN and Select Download Configuration.

VPN Connections

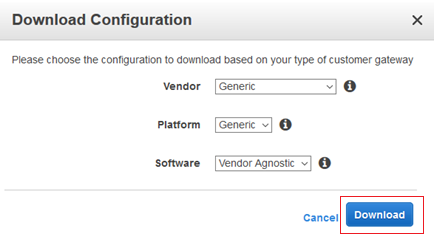
20. On the Download Configuration window, select Vendor as GenericPlatform as Generic, and Software as Vendor Agnostic and click Download button.

Download Configuration window

NOTE: Download the file and open it in any text editor software, Notepad++ recommended.

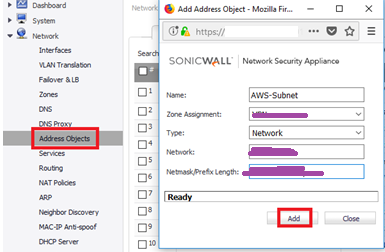
21. Now login to SonicWALL Web console and create address object for AWS subnet (AWS VPC).

SonicWALL Web console

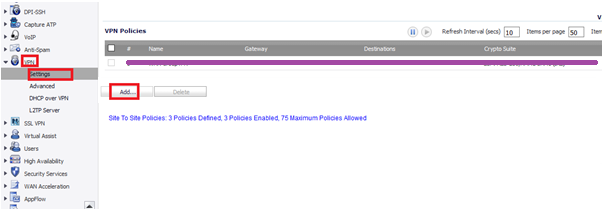
22.  Navigate to VPN > Settings and click Add.

Navigate to VPN

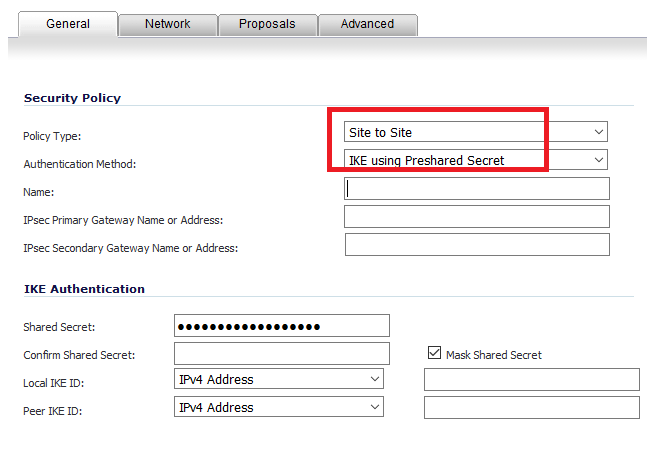
23. Under General TabPolicy Type as Site to SiteAuthentication Method as PSK, any relevant name.

24. Go back to the AWS VPN file, navigate to section “IPSec Tunnel #1”, search for “Virtual Private Gateway” and copy the IP to IPsec Primary Gateway.

25. Under section “IPSec Tunnel #1”, search for “Pre-Shared Key” and copy the key as Shared Secret.

Pre-Shared-Key

26. Go to tab Network.

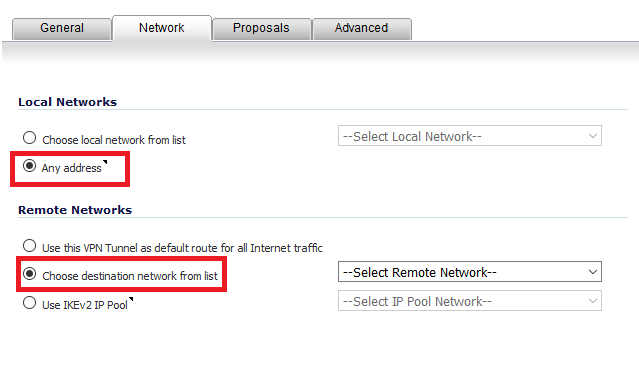
27. Select Any address for Local Networks and select the AWS subnet (created in step 23) as destination network.

Note : It is compulsory to select the local networks as Any address, else traffic will not pass. Verified on SonicOS Enhanced 6.2.7.1-23n

Local-Networks

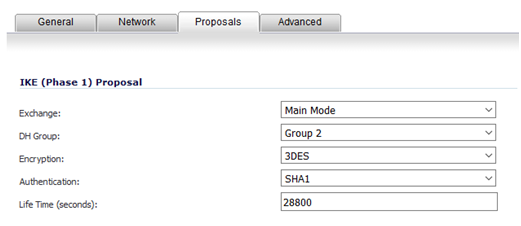
28. Go to Proposals tab, select Main Mode for Exchange.

29. Go back to the AWS VPN file, under section “IPSec Tunnel #1”, search for “DiffieHellman” and match the same on SonicWALL.

30. Search for “Encryption Algorithm”, “Authentication Algorithm” and “Lifetime” and match the same on SonicWALL.

Authentication Algorithm


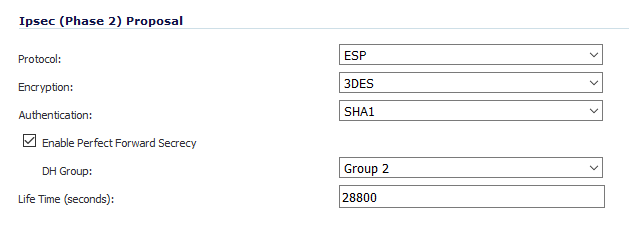
31. For “Ipsec (Phase 2) Proposal”, Go back to the AWS VPN file, under section “#2: IPSec Configuration”, search for “Protocol”, “Encryption Algorithm”, “Authentication Algorithm” and match the same on SonicWALL.


32. In SonicWALL enable Perfect Forward Secrecy and search for “Perfect Forward Secrecy” in AWS file, and match the DH Group on SonicWALL.

33. Search for “Lifetime” in AWS file, and match the same on SonicWALL.

34. Click OK to create the Tunnel.

35. To Verify go to VPN > Settings and check for Green mark, access the traffic between the sites.

VPN security

Recover Failed/Dead Exchange Server 2013


Recover an Exchange Server

You can recover a lost server by using the Setup /m:RecoverServer switch in Microsoft Exchange Server 2013. Most of the settings for a computer running Exchange 2013 are stored in Active Directory. The /m:RecoverServer switch rebuilds an Exchange server with the same name by using the settings and other information stored in Active Directory.

Recovering a lost Exchange server is often accomplished by using new hardware. However, you can also use an existing server.


  1. Install Windows OS and give same IP as previous (failed Exchange).

1


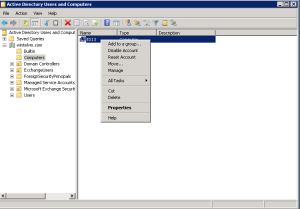
2. Reset Domain account as shown in below image.

2


3. Join Domain with same computer name as previous.

4.Drives letters must be same a previous installation.

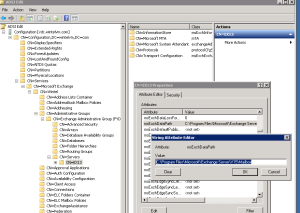
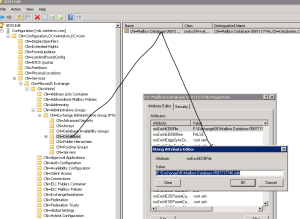
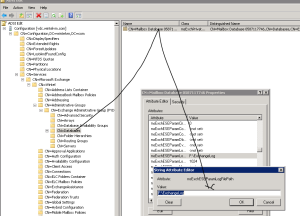
You can view previous installation path from adsiedit.msc


3


  1. Create Drive Letter and Folder path for Datebase(.edb) and logs accordingly. You can get that from Adsiedit.msc


And restore .EDB file from backup on that folder.

4


5


  1. Install Exchange 2013 Prerequisites.


  1. Install Exchange 2013 with /m:RecoverServer


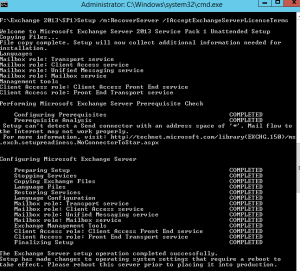
Setup /m:RecoverServer /IAcceptExchangeServerLicenseTerms


6

Now check Exchange Server Services.

Move Database and Log Folder Path in Exchange 2013

Move Database and Log Folder Path in Exchange 2013

To view current list of databases type Get-MailboxDatabase cmdlet in EMS.

1

By default Exchange Database location is under C:\Program Files\Microsoft\Exchange Server\V15\Mailbox\ which is definitely not recommended place to store the Mailbox database.

It is always recommended to store Exchange Database and Logs on a different drive other than C:\ Drive.


Here, I will move both database and logs to F drive.

Before you proceed please be aware that:

  • the command must be run while logged on to the mailbox server hosting the database
  • this process requires that the database be dismounted while the move takes place, making it unavailable for mailbox users
  • this process should not be followed for databases that are replicated within a Database Availability Group
  • this process cannot be run at the same time as a backup is in progress


Move-Databasepath “Mailbox Database 0587117746″ -EdbFilepath “F:\ExchangeDB\Mailbox Database 0587117746.edb” -LogFolderpath “F:\ExchangeLog”

2

Now let’s verify if the database has changed its location. Run the following cmdlet again.

Get-MailboxDatabase | FL Name,*Path*

3